
This is the fifth part of the eight-part series documented on the web app project I undertook – OSAAT. In the previous posts, I gave a brief introduction of the project, along with how we communicated, researched and kicked off the site development. The second part contained a thorough walkthrough of the development of the login page and its authentication. And in the third and fourth parts, I went through how I built all the Customer pages and Order Wizard.
In this post, we will explore the Calendar page designs, features, along how I went about building it. Unlike the previous posts we looked into, this is just 1 page on the site. Nonetheless, it’s a very important part of the site that contains customised features within calendars. I will also show you how the customer can schedule a calendar event using a form in the calendars page, along with how the admins can interact with the calendar pages to make the best use of it.
As always, I’ll show you the mockup UI that was provided along with an overview of the models that were used. Then I will give a brief walk-through on how these features were built and implemented into the system.
UI DESIGN MOCKUPS


The first 3 mockups are about the schedule popup on the customer page, which can be accessed through a click of a button, and can be used to create events. The fourth mockup shows what the edit event popup must look like from the calendar page, which is supposed to be triggered when the pen icon is clicked on any event. Finally, I have added the mockups for the 3 tabs within the calendar page, which apparently look very different from each other. Some parts were improvised, especially in the technician calendar page, to fit the client’s needs as I worked.
FEATURES
| FEATURE | DESCRIPTION |
|---|---|
| Calendar Page | |
| Technician Calendar | Calendar page that displays all the technician events, allowing edit through a popup |
| Sales Calendar | Calendar page that displays all the technician events, allowing editing through a popup |
| Delivery Calendar | Calendar page that displays all the sales events, allowing editing through a popup |
| Schedule Event – Customer Info Page | |
| Technician Event Schedule | Clicking “SCHEDULE A VISIT” should open an orange pop-up with all the fields in the image, clicking save should create a Technician Event and redirect the user to the technician calendar. The client later requested to have all the fields automatically filled, and have the time field to be between 7 AM to 6 PM, along with the minutes field disabled. |
| Sales Event Schedule | Clicking “SCHEDULE A VISIT” should open a green pop-up with all the fields in the image, clicking save should create a Sales Event and redirect the user to the sales calendar The client later requested to have all the fields automatically filled, and have the time field be between 7 AM to 6 PM, along with the minutes field disabled. |
| Delivery Event Schedule – Later Removed | This pop-up was built, but was later removed because the company didn’t want customers creating delivery events |
CALENDAR PAGE
The calendar page can be accessed from the homepage only by the admins. Technician, Sales and Delivery Event tables were created from Django models. The calendar page contains all 3 calendars, allowing switching through tabs.
Technician Calendar
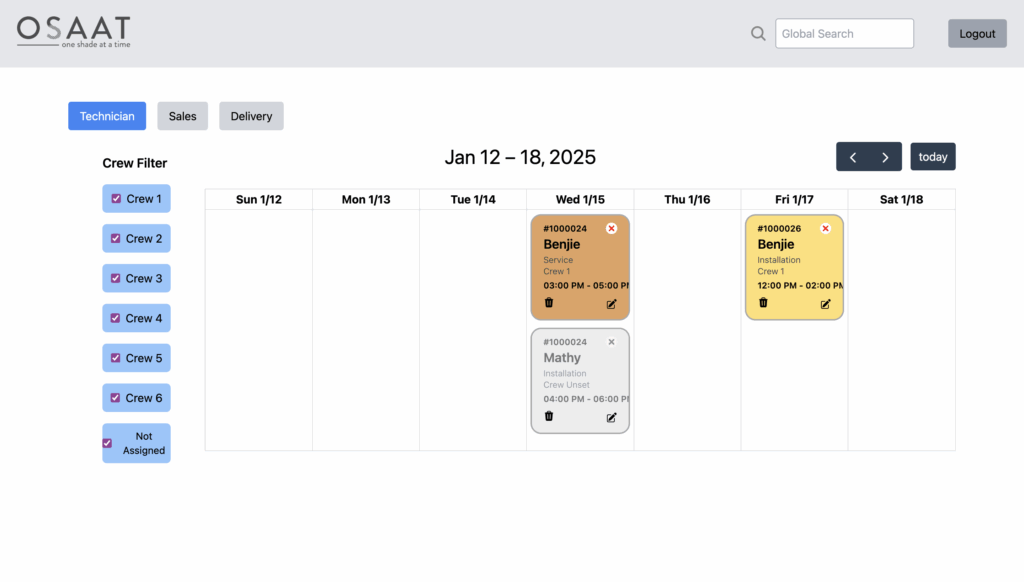
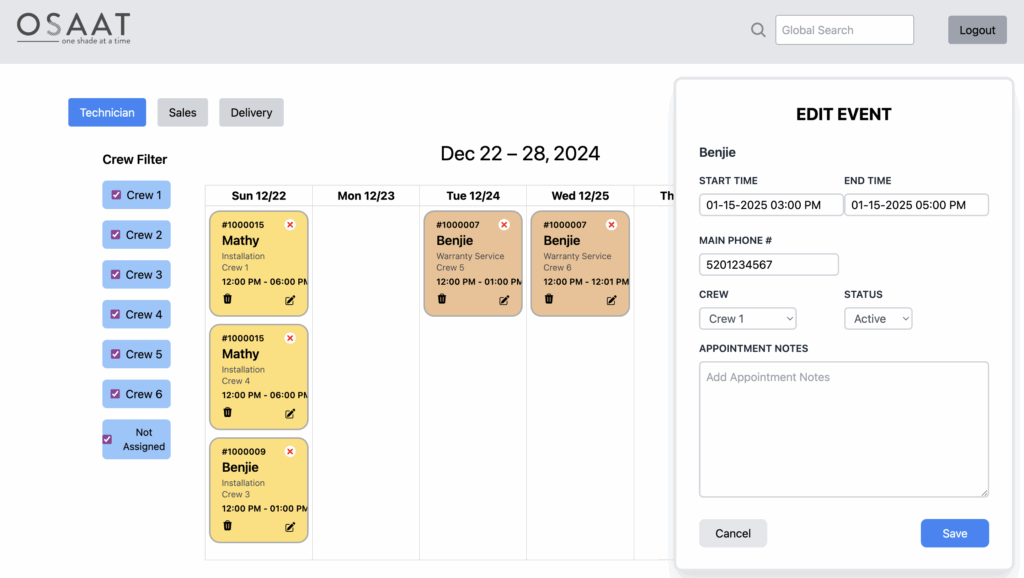
The events were colour-coded based on their types, and the filter allowed checking or unchecking crews. The red “x” indicated an unconfirmed event, and a green check indicated a confirmed event.
Sales Calendar
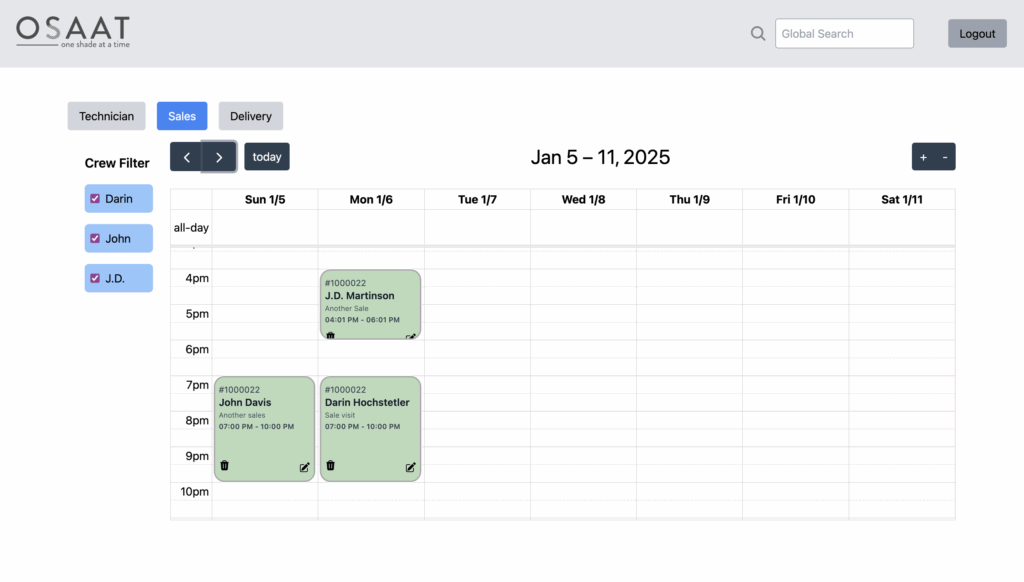
Sales events had a crew filter along with a calendar with a different view, allowing event editing and deletion.
SCHEDULE EVENT
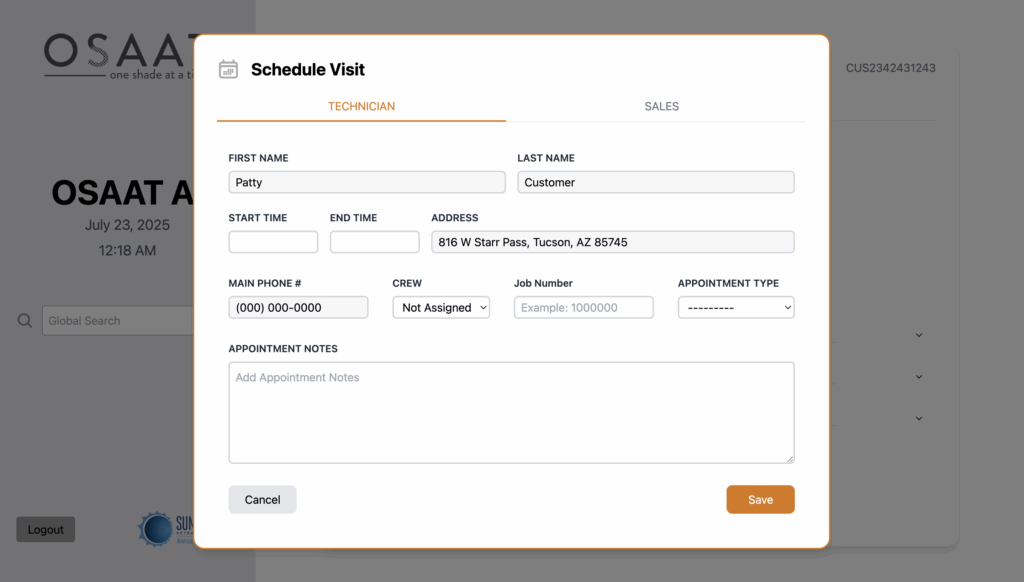
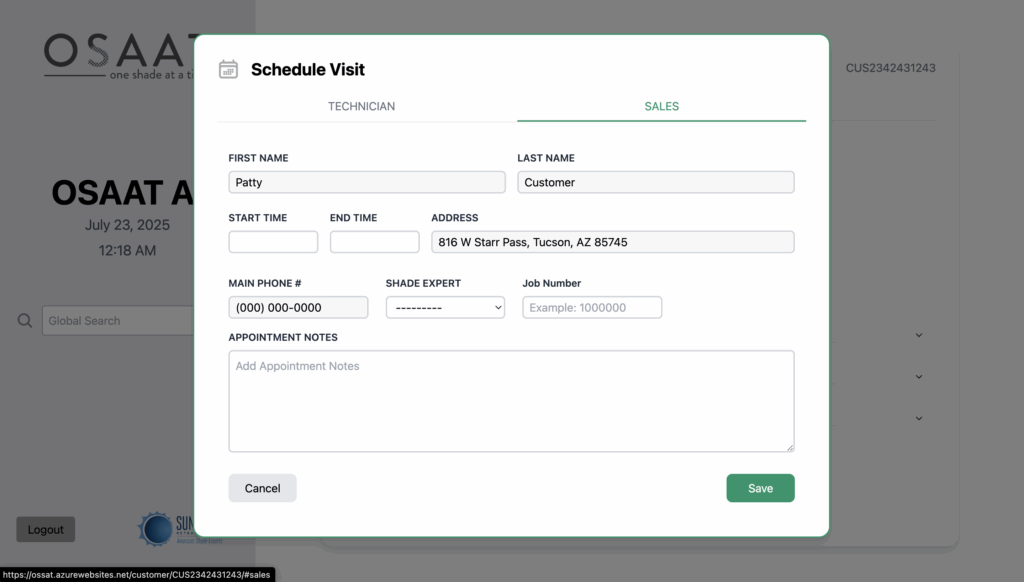
Technician event scheduling and sales event scheduling were colour-coded orange and green with customer details autofilled. Start time and end time were between 7 AM and 6 PM, with 1-hour gaps. Saving the form creates the respective event and redirects the user to the calendars page we discussed before.
NEXT STEPS
This post is the fourth part of the whole project documentation series. In the next article, I will go through the Calendar pages, about working on schedules and how the admins interact with them. Feel free to use the links below to read about any part of the project you are interested in. I’ll see you on the next post!
- Meetings and Project Kickoff – https://stagmoney.com/meetings-and-project-kickoff-osaat-part-1/
- Deployment, Authentication and Dashboard – https://stagmoney.com/deployment-authentication-and-dashboard/
- Customer Page – https://stagmoney.com/customer-pages/
- Order Wizard – https://stagmoney.com/order-wizard/
- Calendar – Current Post
- Workstation – Upcoming
- Map Navigation – Upcoming
- Minor Features – Upcoming
